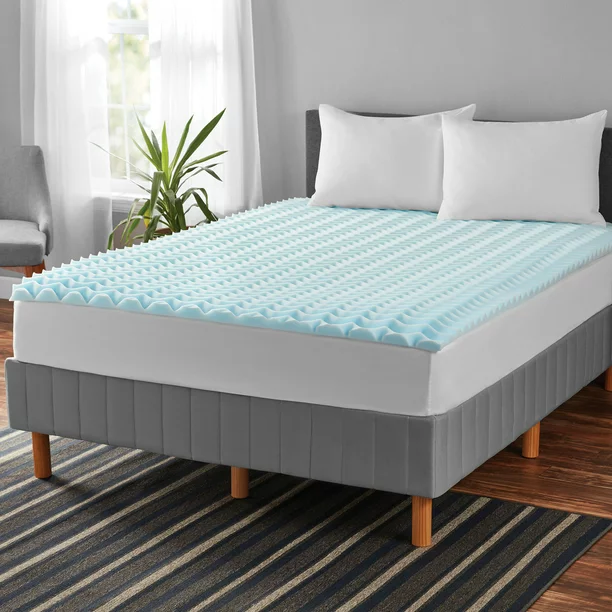


The safest way to clean a mattress protector is to follow its sewn care label and the instructions for that exact product. There is no universal cold, warm, gentle, low-heat, or air-dry setting that is right for every protector.
Start with this sequence:
- Identify what part you are cleaning and how it is constructed.
- Read the protector's care label and, when needed, the manufacturer's product instructions.
- Treat the specific spill or soil with a product the label allows.
- Check that the washer or handwashing setup can handle the protector safely.
- Wash, rinse, and dry only as directed.
- Let the protector dry completely, then inspect its barrier, fit, seams, and closures.
Manufacturer instructions take priority over generic laundry advice. Similar-looking products may have different materials, laminates, coatings, padding, and adhesives. Some multi-part covers even have a machine-washable top and a bottom section that is spot-clean only 1.
First, identify the protector
Remove the sheets and look at the protector before taking it off the mattress. Common constructions include:
- Fitted protector: Covers the sleep surface and grips the sides with a fabric skirt or elastic, much like a fitted sheet.
- Quilted or padded protector: Includes batting, fill, or a thicker absorbent layer that holds more water and takes longer to dry.
- Five-sided protector: Covers the top and four sides but leaves the mattress bottom exposed.
- Six-sided encasement: Encloses the entire mattress and usually closes with a zipper.
- Waterproof or water-resistant barrier: Uses a film, laminate, or coating under or within the fabric. It may be present in any of the constructions above.
- Removable-top system: Has a washable upper panel that zips or fastens to another section. The two parts may have different care instructions.
Do not assume that a zippered fabric attached to a mattress is a separate protector. It may be the mattress's own cover, and some mattress covers must not be removed or machine washed. Check the mattress instructions if the item did not come as a separate accessory.
Read both labels before choosing settings
The protector label should answer as many of these questions as possible:
- Is the item machine washable, hand washable, or spot-clean only?
- Should removable sections be separated?
- What water temperature and cycle are allowed?
- Does it require a particular detergent type or amount?
- Are chlorine bleach, non-chlorine bleach, stain removers, or fabric softener allowed?
- Is an additional rinse recommended or prohibited?
- Can it be tumble dried, and at what setting?
- May it be air dried, ironed, or dry cleaned?
- Should zippers, hook-and-loop tabs, or other closures be fastened before washing?
Also check the washer and dryer manuals for capacity, bulky-item loading, detergent, and cycle instructions. If the protector's tag is missing, use its model name, order record, or manufacturer support page to find the exact instructions. Until you confirm them, do not guess that machine washing, heat, bleach, or a stain product is safe.
Check whether it is a special-purpose encasement
An ordinary protector can usually be removed whenever its care instructions call for cleaning. An allergen encasement or a bedbug encasement may be part of a larger control plan, so removing it has different consequences.
Allergen encasements
A dust-mite allergen encasement is intended to form a barrier around a mattress or foundation. It should be treated as part of a clinician-led, multi-step allergen plan, not as an ordinary mattress pad.
A joint allergy practice parameter found that woven and nonwoven encasements behave differently. Smooth woven encasements may not need routine washing simply because they are in use, while some nonwoven materials collect surface allergen and may not be washable. The same guidance notes that encasements can reduce exposure but often do not provide a clinical benefit on their own 2.
Follow the encasement maker's cleaning directions and any plan provided by the treating clinician. Do not apply a general mattress-protector wash schedule or a high-temperature dust-mite rule to a product that cannot tolerate it.
Bedbug encasements
Do not unzip or remove an encasement that is trapping bedbugs during an active infestation unless the pest-management plan specifically tells you to. The US Environmental Protection Agency advises using bedbug-proof covers with fully closing zippers that are sturdy enough to remain in place for a year because trapped bedbugs can survive for months 3.
Check an active encasement regularly for holes, opening seams, or a zipper that no longer closes. If it is damaged or contaminated, contact the pest professional or local pest-management service before opening, patching, laundering, or replacing it. Moving an infested encasement without containment can spread bedbugs.
Pretreat spills and body fluids safely
Deal with a fresh spill promptly, but do not improvise a chemical recipe.
- Remove any solid material without grinding it into the fabric.
- Blot excess liquid with an absorbent cloth. Avoid pushing the spill through seams or an opening in the barrier.
- Check the protector label for an approved stain treatment.
- Follow the stain product's directions for amount, contact time, rinsing, ventilation, and protective equipment.
- Keep the stained area away from children and pets until the product has been rinsed or dried as directed.
A diluted detergent, an enzyme product, vinegar, baking soda, oxygen bleach, or chlorine bleach is not automatically safe for a waterproof film, adhesive, fill, dye, elastic, or zipper. Use one only when both the protector instructions and the cleaner label permit it.
Never mix bleach or another disinfectant with vinegar, ammonia, a stain remover, or another cleaner. CDC warns that mixing bleach or disinfectants with other cleaners can release dangerous vapors 4. If products are mixed accidentally and cause a strong odor, coughing, breathing difficulty, burning, dizziness, or eye irritation, leave the area for fresh air and seek urgent medical guidance.
If someone is sick or the protector has body fluids on it
Wear disposable gloves when handling laundry contaminated with blood, vomit, urine, stool, or other body fluids. Do not shake the protector. Keep it contained while carrying it to the laundry area, remove the gloves without touching your face, and wash your hands afterward. These steps reduce contact with the soil and avoid dispersing it through the room 5.
CDC's current household guidance says to launder washable items with detergent at the recommended water temperature and dry them completely. It also says laundry from a sick person can generally be washed with other people's items 6. A bulky mattress protector may still need its own load because of washer capacity, balance, or its care label.
Use the warmest setting that is appropriate for the protector, not the hottest setting the washer can produce. If a clinician, public-health authority, or product label calls for a disinfection method the protector cannot tolerate, contact the protector manufacturer for an approved alternative. Replace the protector if it cannot be cleaned adequately for the situation.
Machine-washing workflow
Machine wash only when the protector label permits it.
1. Check capacity and movement
A protector needs enough room to move through water and detergent. Do not force it into a washer, wrap it around an agitator, or compress it beneath the rim. Padding and encasement panels can become much heavier when wet.
Check the appliance manual for its usable capacity and bulky-item instructions. Whirlpool's general washer guidance, for example, advises avoiding overloads, distributing bulky items evenly around the drum, and rearranging an imbalanced load 7. Use your own washer's directions because loading methods differ by machine.
If the protector cannot move freely, use a larger suitable washer or a laundry service that agrees to follow the care label. Do not add towels or sheets merely to "balance" the load unless both the washer instructions and protector care directions allow it.
2. Prepare closures as directed
Empty anything caught in the zipper track or hook-and-loop fastener. Close, open, separate, or cover closures exactly as the manufacturer directs. Guessing can leave an encasement interior dirty, snag the fabric, or strain a zipper.
3. Add the permitted laundry product
Use the detergent type and amount allowed by the protector label and required by the washer. A high-efficiency machine may require an HE detergent. More detergent does not guarantee better cleaning and can make rinsing harder.
Do not assume that "mild" detergent, fabric softener, chlorine bleach, non-chlorine bleach, scent boosters, or sanitizer is compatible. If the label prohibits a product, leave it out. If the label is silent and the manufacturer cannot clarify, avoid optional additives rather than experimenting on the barrier.
4. Select the label-approved cycle and temperature
Match the wash cycle, water temperature, spin speed, and soil setting to the protector's instructions. Cold water, warm water, a gentle cycle, or a bedding cycle may each be correct for a particular product. None is a safe universal default.
Stay nearby when washing an unusually bulky protector. If the washer bangs, walks, stalls, or reports an imbalance, pause it according to the appliance manual and redistribute or remove the load. Do not reach into a moving drum.
5. Rinse as directed
Use the rinse included in the label-approved cycle unless the protector or detergent instructions call for a different option. An extra rinse may help when a permitted detergent has not cleared, but it also adds agitation and water exposure. Do not make it an automatic step for every barrier or padded protector.
Handwashing workflow
Hand wash only if the product instructions allow it. "Too large for my washer" does not mean "safe to soak in a bathtub."
- Use a clean basin that can support the protector without snagging it.
- Add the approved water temperature and detergent amount.
- Soak, press, or agitate only for as long and as firmly as the instructions permit.
- Drain the wash water before lifting the protector.
- Rinse by the method on the label. Do not wring, twist, scrub, or stretch the item unless the maker permits it.
- Support the wet protector as you transfer it to the approved drying setup.
Wet, heavy laundry can contribute to back and shoulder strains. OSHA's laundry guidance recommends limiting the load and getting help when lifting wet, bulky items 8. If you cannot lift the protector without bending, twisting, or losing control of it, drain more water and ask another adult to help.
Keep children and pets away from an open washer, filled tub, or soaking basin. Close the washer door or lid when it is not in use. The US Consumer Product Safety Commission specifically advises keeping washing machines closed to reduce in-home drowning hazards for young children 9.
Dry the protector completely
Follow the exact drying method on the protector label:
- If tumble drying is allowed, use the named heat and cycle setting and a dryer with enough capacity for the protector to move.
- If air drying is allowed, support the item as directed so a heavy wet section does not stretch the fabric, elastic, or seams.
- If the product has removable sections, confirm the drying method for each section.
- Do not iron, dry clean, place on a radiator, or use another heat source unless the instructions specifically allow it.
Do not put a protector back on the mattress or fold it for storage while any layer is damp. Check the center, padded areas, elastic, zipper tape, corners, and thick seams rather than judging dryness from the outer surface alone. CDC household laundry guidance calls for drying laundered items completely 6.
If the mattress became wet, clean it by the mattress manufacturer's directions and let it dry completely before covering it.
Inspect it before reuse
Hold the clean, dry protector in good light and inspect both sides. Look for:
- peeling, bubbling, or separation between fabric and a membrane
- brittle, sticky, cracked, or distorted barrier material
- pinholes, tears, worn-thin areas, or opened seams
- exposed fill or padding that has clumped into hard gaps
- elastic that no longer holds the protector in place
- a zipper that separates, has missing teeth, or cannot close fully
- a persistent contaminant or odor that the allowed cleaning method did not remove
Replace the protector when damage prevents it from fitting, closing, containing allergens or bedbugs, or providing the liquid barrier it is supposed to provide. Cosmetic discoloration alone does not prove failure, and there is no evidence-based two-year, three-year, or other fixed replacement age for every protector.
Do not pour water onto the protector as a home leak test unless its manufacturer provides that test and explains how to perform it. An improvised test can wet the mattress or miss small failures that occur only under pressure.
How often should you wash it?
There is no universal one-to-three-month schedule. Use the protector's label and actual conditions:
- Wash after a spill, accident, or visible soil when the instructions call for laundering.
- Wash after illness or body-fluid contamination using the appropriate handling and label-approved method.
- Clean more often when sweat, skin products, pet contact, or repeated use visibly soils the protector.
- Follow the manufacturer's routine-care interval if it provides one.
- Follow the clinician's plan for a diagnosed allergy rather than applying a generic bedding schedule to the encasement.
- Leave an active bedbug encasement closed unless the pest-management plan directs removal.
A protector underneath a clean fitted sheet may need a different routine from a removable padded surface used directly under the sleeper. Condition, exposure, and product instructions are more useful than a calendar rule.
When to get help
Contact the protector manufacturer when the care label is missing, the construction is unclear, a required stain treatment is not listed, or a wash has changed the barrier. Contact the washer manufacturer or use a suitable larger machine when the load cannot move or balance safely.
For an active bedbug infestation, coordinate any encasement removal or replacement with a qualified pest-management professional. For a diagnosed allergy, use the encasement within the plan recommended by the treating clinician. If body-fluid contamination involves a known infection or special medical precautions, follow the instructions given by the clinician or public-health authority.